> For the complete documentation index, see [llms.txt](https://docs.wplms.io/llms.txt). Markdown versions of documentation pages are available by appending `.md` to page URLs; this page is available as [Markdown](https://docs.wplms.io/installation/installing-wplms-on-a-fresh-wp-install.md).
# Installing WPLMS on a Fresh WP Install
**What is a Fresh WordPress site ?** A Fresh WordPress site is a WordPress site with no content inside it. A fresh wordpress site will have 1 page with title Sample Page, 1 post with title Hello world !. One plugin Hello Dolly and Default WordPress Themes like TwentyTwenty.
{% hint style="info" %}
You can also reset an exsiting WordPress site to get a fresh wordpress site.
[Learn how to reset ›](https://www.wpbeginner.com/wp-tutorials/how-to-restart-a-wordpress-site-reset-wordpress-the-fast-way/)
{% endhint %}
### Hosting Requirements and Recommendations for the WPLMS Theme
WPLMS is an advanced WordPress theme. It provides a complete framework for building educational sites, so comparing WPLMS with any other regular WordPress theme is like comparing apples to oranges.
WPLMS uses popuplar plugins maintained by the WordPress core team like the BuddyPress, WooCommerce , and BBPress.
Out of these only BuddyPress is the required plugin. If you need to sell courses you will be required to install WooCommerce. If you need Discussion forums on your site, you will need to install BBPress.
The Hosting recommendations posted by these plugins are the basis for WPLMS Hosting recommendations as well.
* **PHP Version** 7.2.1 \[tested upto version 8.3.9 as of 1st December 2024]
* **Mysql/MariaDb Version** 5.6+/10.1+
* **Upload Limit** 10 MB or more
* **PHP Memory Execution Limit** 128 MB or more
* **PHP Time Limit** 300s
* **PHP Post Max Size** 128 MB or more
* **PHP Max Input Vars** 2000
* **PHP extensions required** dom,gmagick,SimpleXML,ssh2,xml,\
xmlreader,curl,date,exif,filter,ftp,gd,hash,iconv,imagick,json,libxml,\
openssl,pcre,posix, sockets, SPL, tokenizer, lib,mbstring,mysqli.
{% hint style="info" %}
The Upload limit is required for the theme even before you can begin uploading. Otherwise you will see an error “The link you followed has expired.” while uploading the theme.[Learn how to increase upload limit ›](https://kinsta.com/blog/wordpress-maximum-upload-file-size/)

{% endhint %}
As a principle we are not affiliated to any hosting company. So the recommendations posted here are unbiased and based on feedback we collected from our users.
Although any hosting plan should work for WPLMS. A [VPS](https://en.wikipedia.org/wiki/Virtual_private_server) or above plan provides better compatibility and lesser issues in the long run. Sharing hosting with everything unlimited usually do not work out good because the server is shared among many entities. From our observation : WPEngine, HostGator, KnownHost, OVH, DigitalOcean and SiteGround are good hosting providers. This list by no means is an exhaustive list, you are free to try other options and if they work great you can help us in updating this list. Just send out an email [here](https://themeforest.net/user/vibethemes/)
### Uploading the theme
Uploading the WPLMS theme is just like any other theme. Following are the steps you can follow to upload the theme.
**Downloading the theme**
Download the WPLMS WordPress theme from your Themeforest Account.**Log in to your WordPress Admin \[a.k.a WP Admin]**

Login to your WordPress administration panel. You can simply append wp-admin to your site's url. So if your site is ABC.com , ABC.com/wp-admin is your WP Admin area.**Go to Apperance - Themes - Upload**

Locate the Apperance in the left menu. Click on it, locate the themes sub-menu item, click on it. Locate the Add new button on your screen.**Upload the Theme**

Click on Upload Theme button. A Upload form will appear. Drag and drop the theme downloaded in the previous step here. Click on Install Button

If you see the below error while uploading the theme, it most likely means that yoursame server is restricting the upload.

The possible reasons for above are :
1. Server Upload limit less than 8MB.
2. PHP Zip library not installed
3. File permissions incorrect(Folder Permissions should be 0755 and file permission should be 0644)
4. WordPress incorrectly configured.
5. Previous attempt of uploading the theme failed due to network issues.
The best course of action in all above cases is to contact your web host. For the last step "previous failed attempt", you can login via FTP and locate for wp-content/themes/wplms folder and remove it.
### Setup Wizard
On uploading and activating the theme, you will see a setup wizard automatically taking control of the things. This is expected and recommended method of installing the theme.
The Purpose of the setup wizard is to configure a lot of settings automatically and avoid the hassle of manually configuring the theme.
**Selecting an Installation Type**
We have categorised the WPLMS theme usage into 4 broad categories : Instructor, Academy, University and MOOC (massive open online courses ). We've Demonstrated the theme into above broad categories and selected a feature set for each of these categories. However, this is just a classification factor and during the course of setup wizard you are free to enable recommended feature, designs for the type of installation you are selecting in this step.
Even after the setup has been completed you can always re-run the setup wizard and enable disable features which you may need later on. For example : [Enabling BigBlueButton Meetings in existing site.](https://www.youtube.com/watch?v=kmIa8kfTxjA)
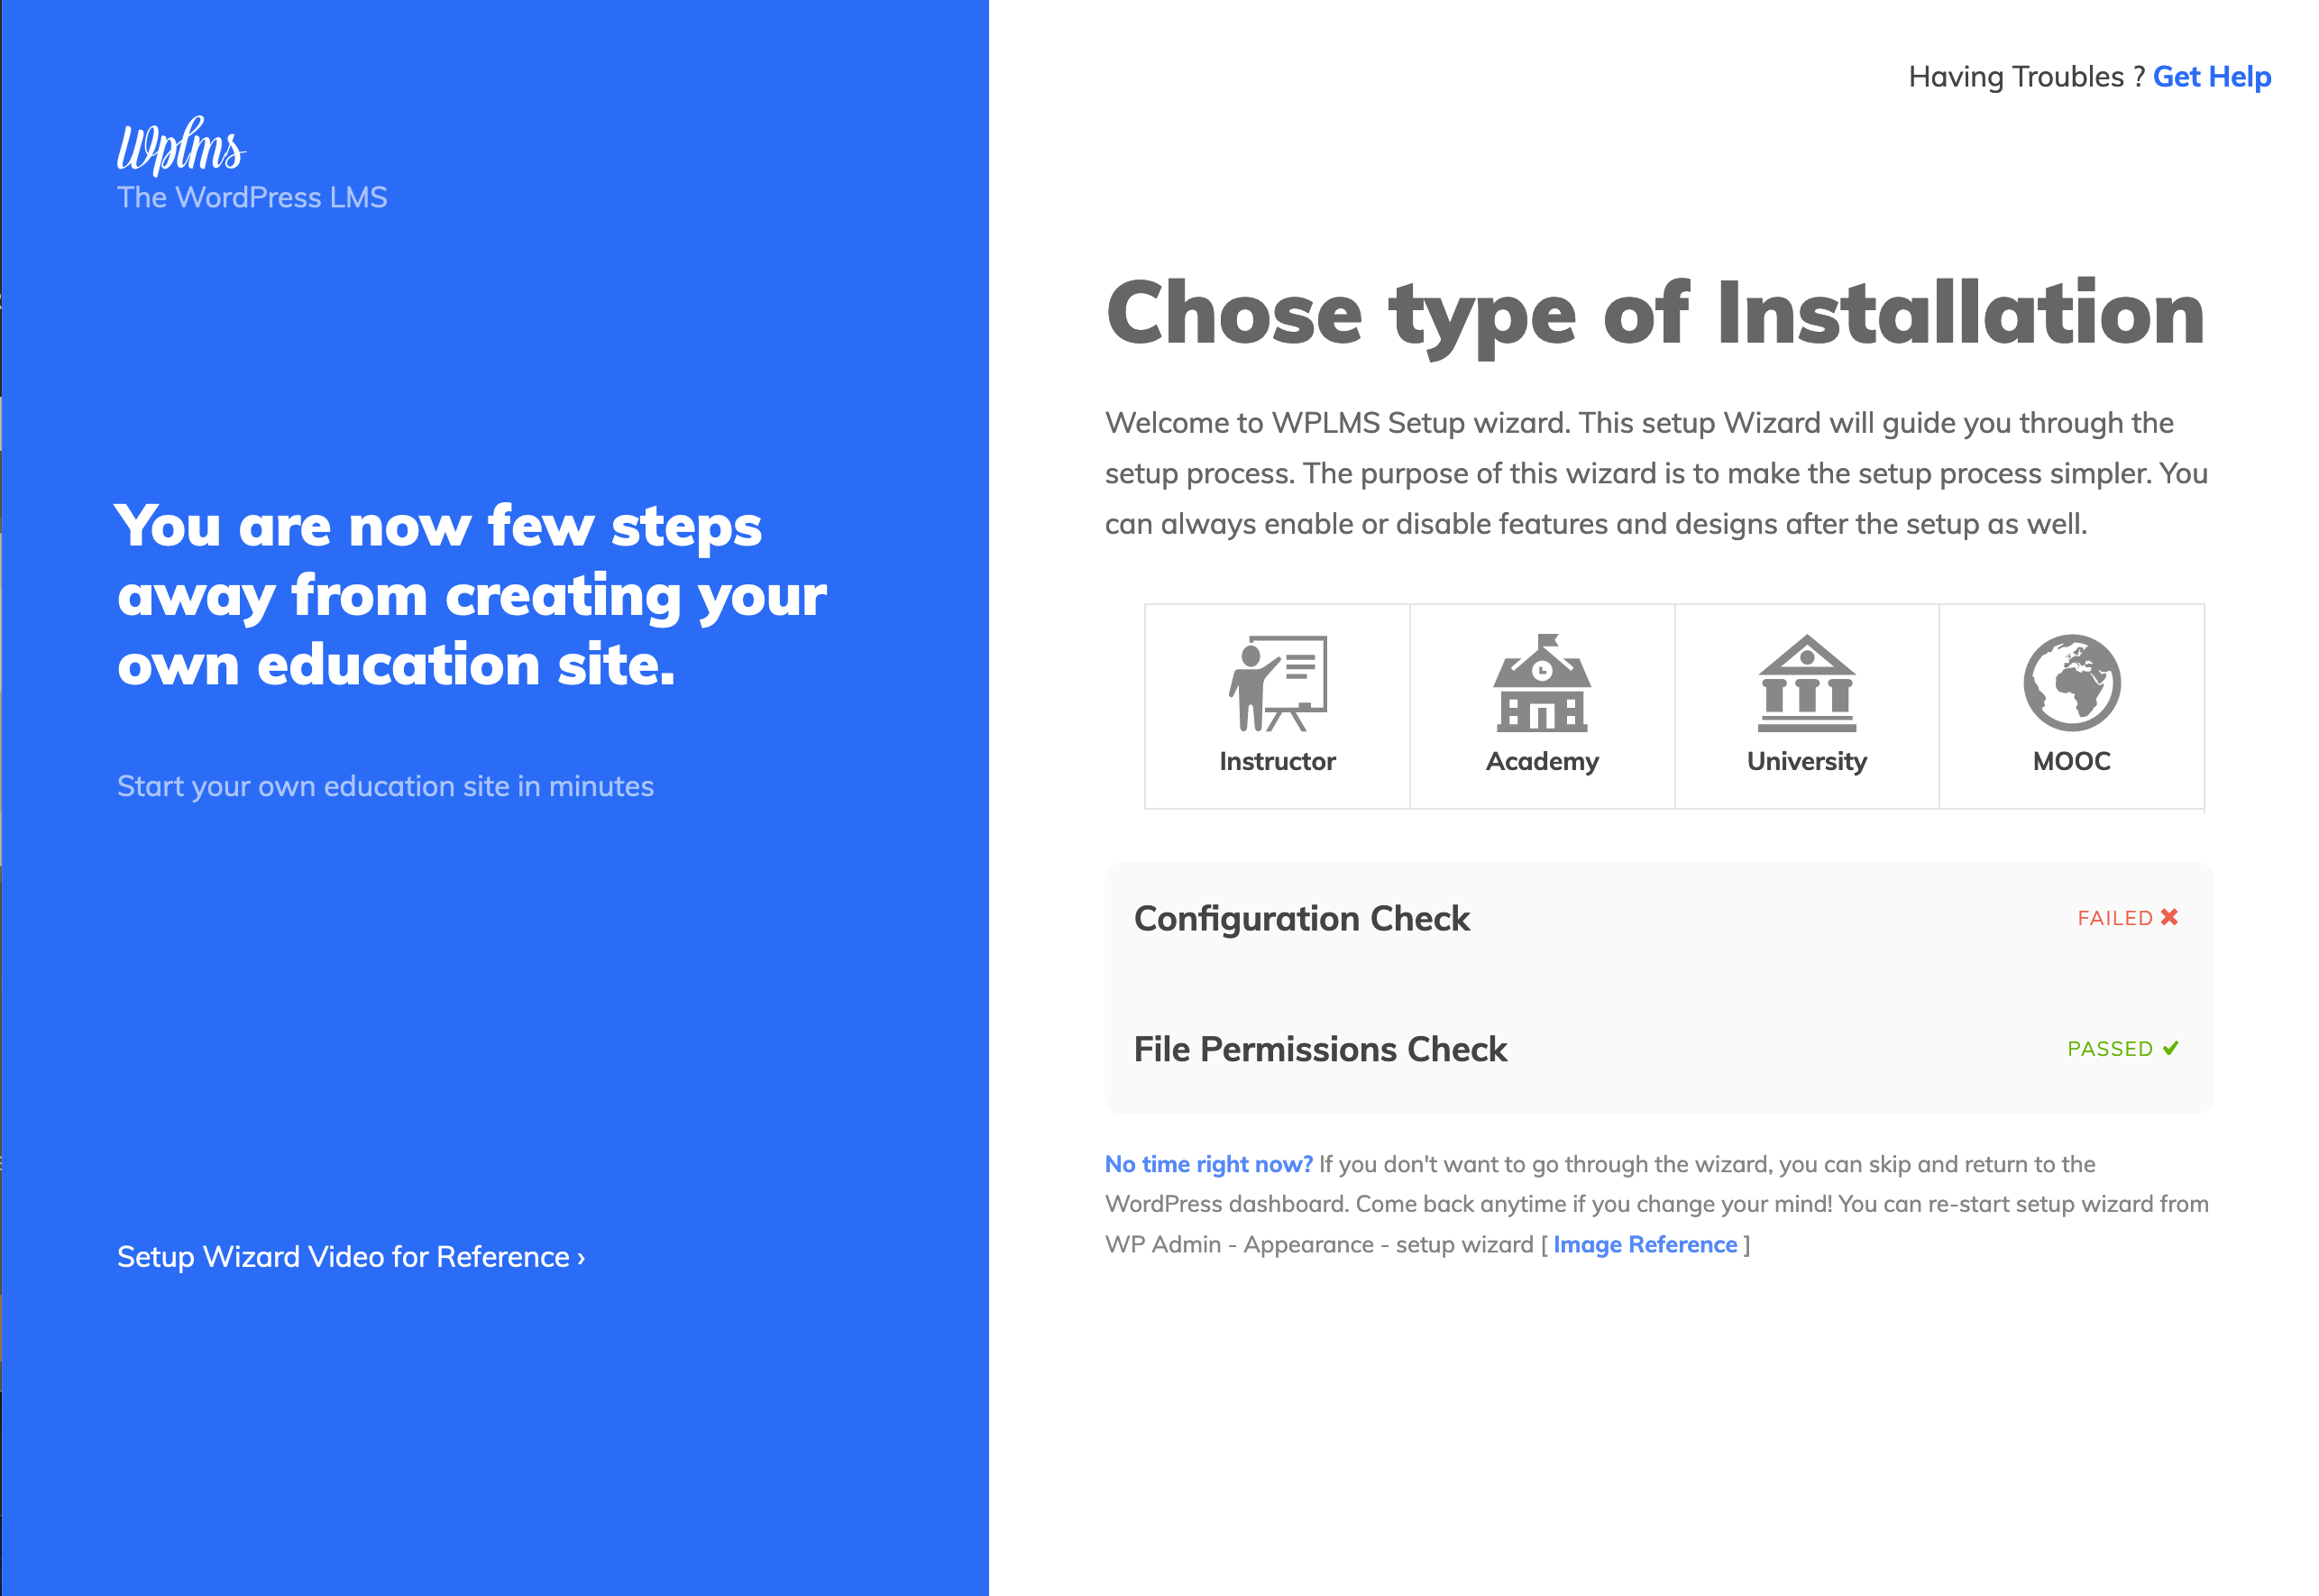
You will also see configuration checks and file permission checks which indicate any potential problem that may arise during the setup wizard. Mouse over to see more details.
It is always better to make sure there is no failed configuration and file permission checks.
However, sometimes failed configuration is disaplyed when WordPress is unable to detect them, in such cases these can be ignored.
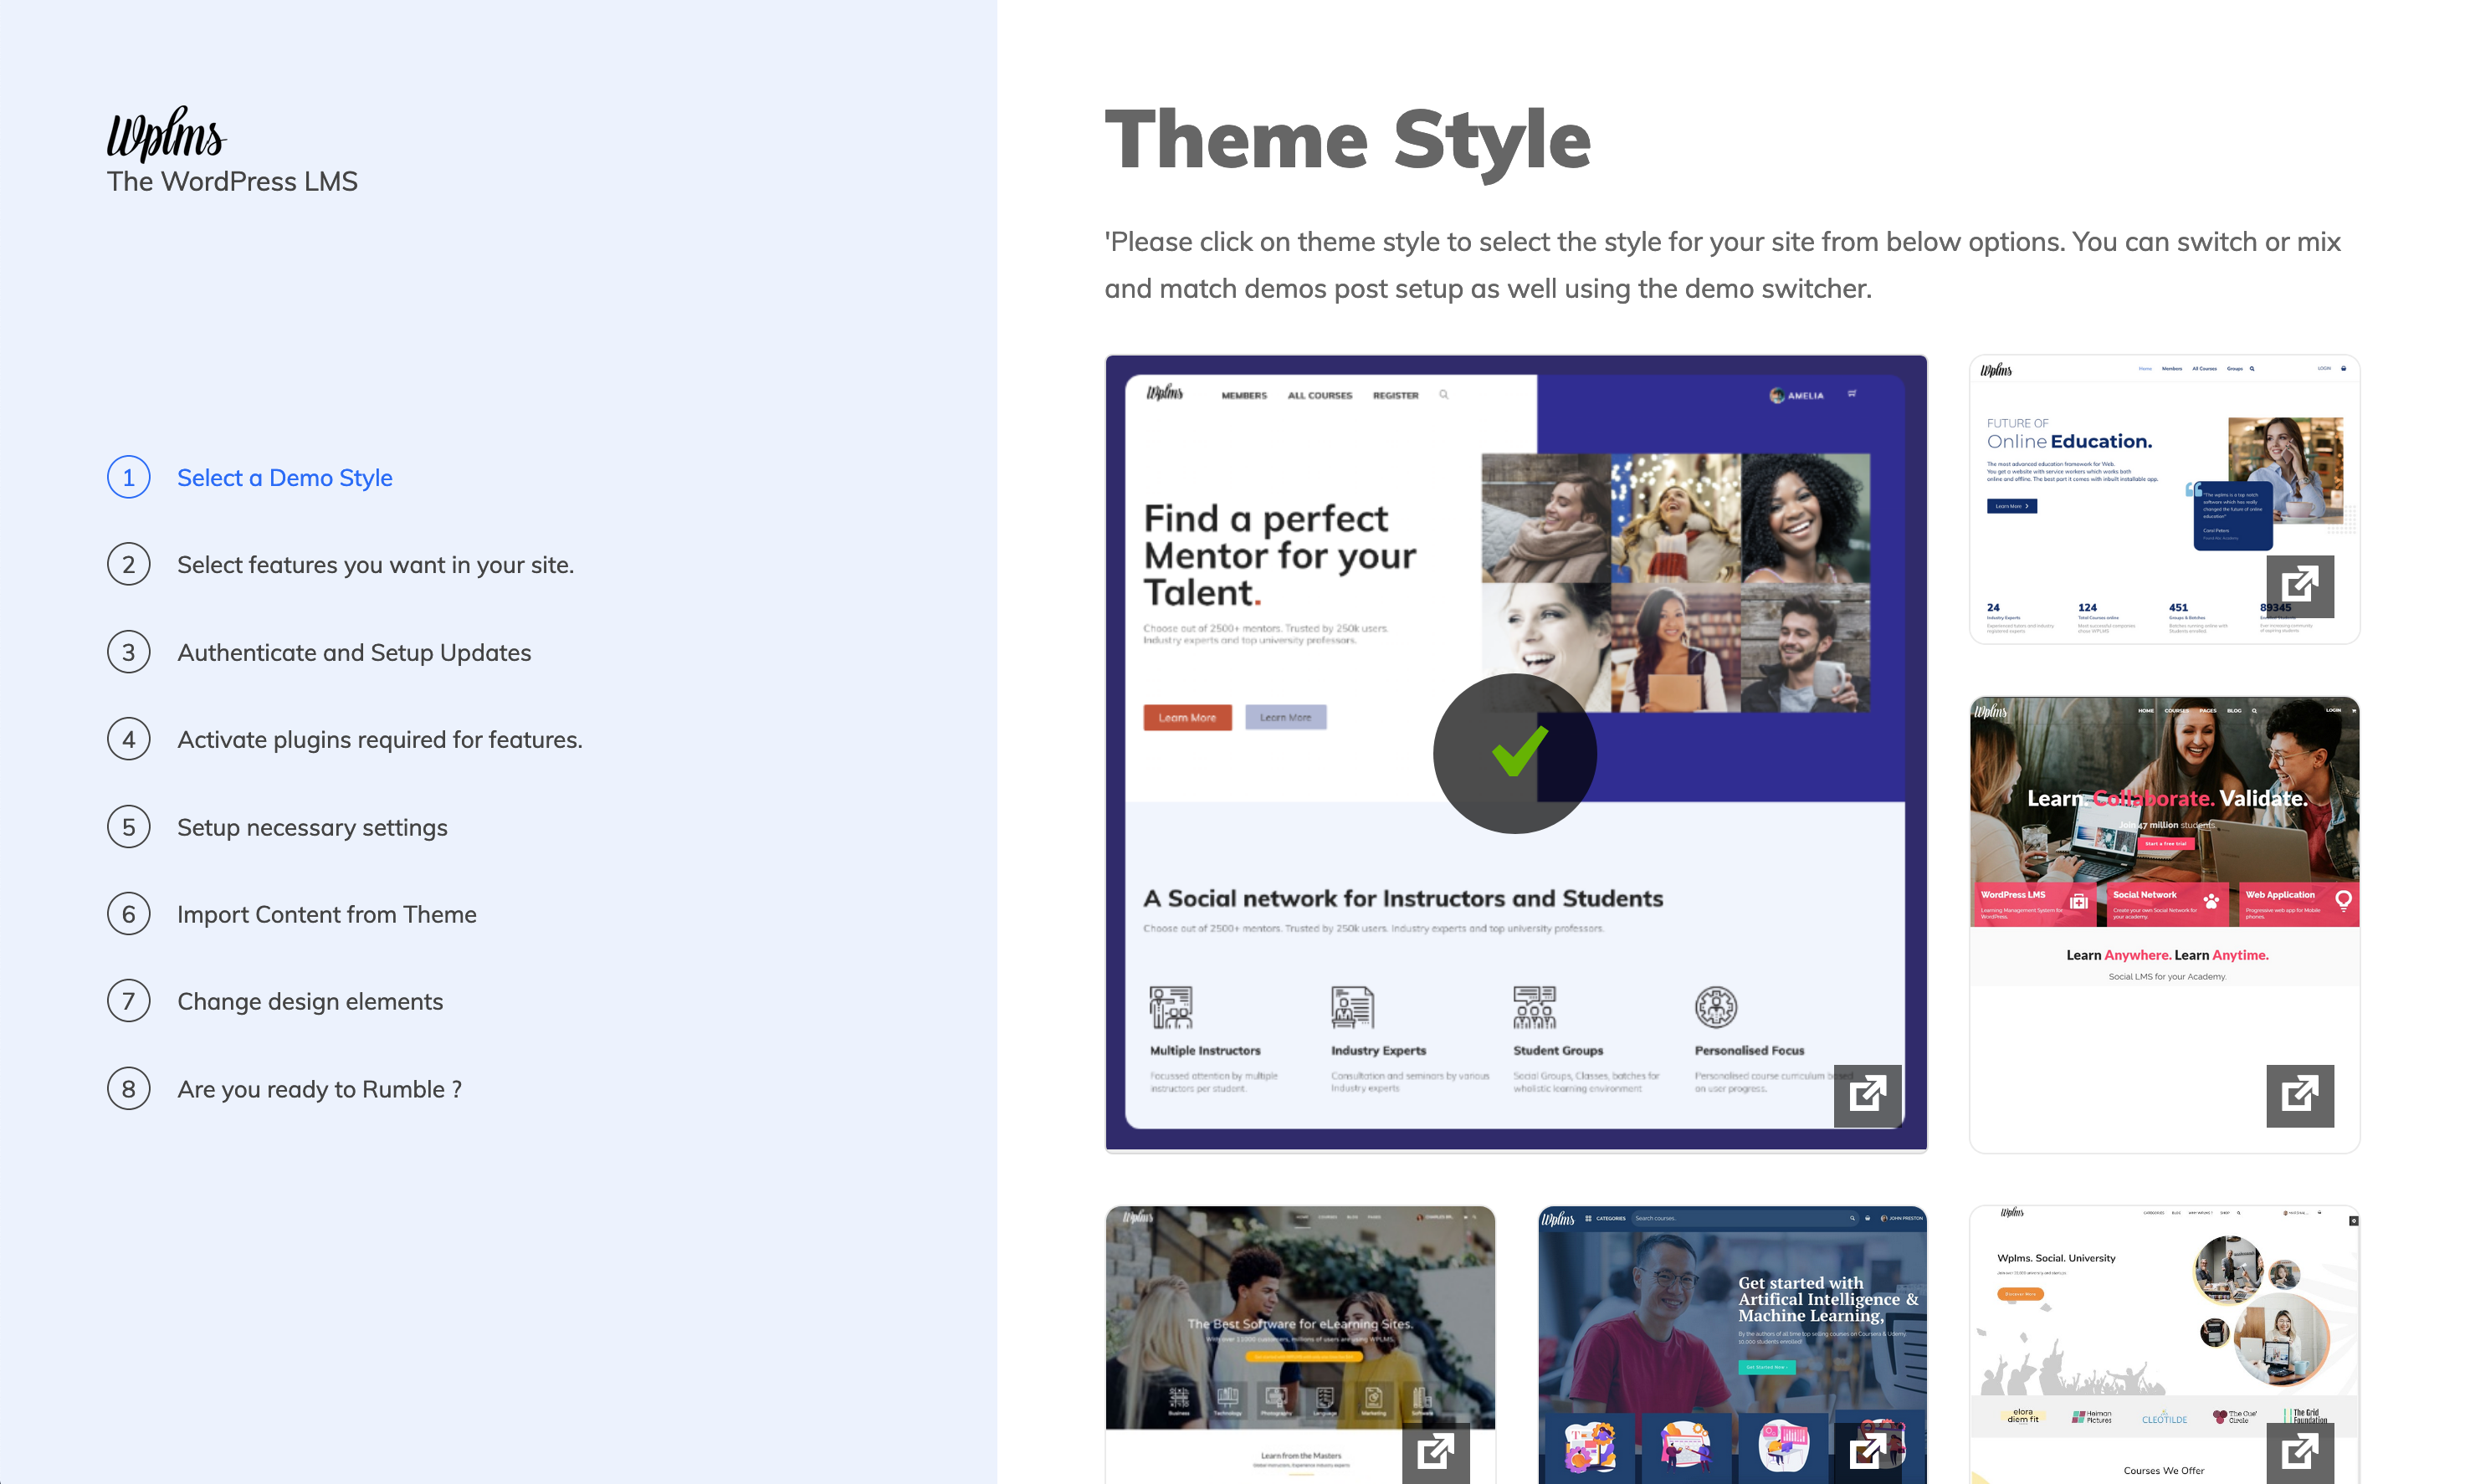
**Select a Demo Style**
If you want to install a Theme Demonstration \[Demo] then click on the image to select it. When a Demo installation is selected, you will see a checkmark over it. To switch to another demo click on its image select it. To see how the demo works, click on the pop-out icon and you can go through the demos.
Choosing latest demos is always a good idea as they have better design and the import wizard has been tested thoroughly for the demos.
You can skip this step from the bottom skip option to not install any content or demo style.
The images on this screen require an active internet connection, if you do not see images then please check your internet connection.
Below the demos, you will find import content section. This expects a upload file to use as a demo style. We will come back to this area in later sections.
If you have an existing WPLMS site or you are developing a WPLMS site on your local computer. You can use the WPLMS Export wizard to take out the export zip from your site and import that zip file here.
**Select Features for this Site**
In this area you select features for your site. To select a feature click on it and a check mark would appear over it. Click on it again to remove the check mark. Some of the features will come pre-selected based on the demo style you've selected in previous step.

### Authenticate and setup updates
Authenticate your purchase by either authenticating from Envato account or by entering purchase code.
Authenticating with Envato account also sets up the theme for auto-updates. Otherwise you can authenticate again from WP admin - WPLMS - Getting started section.
This is also required to download the plugins in the next step. Hence you will not be able to skip this step and proceed to the next step in installation.
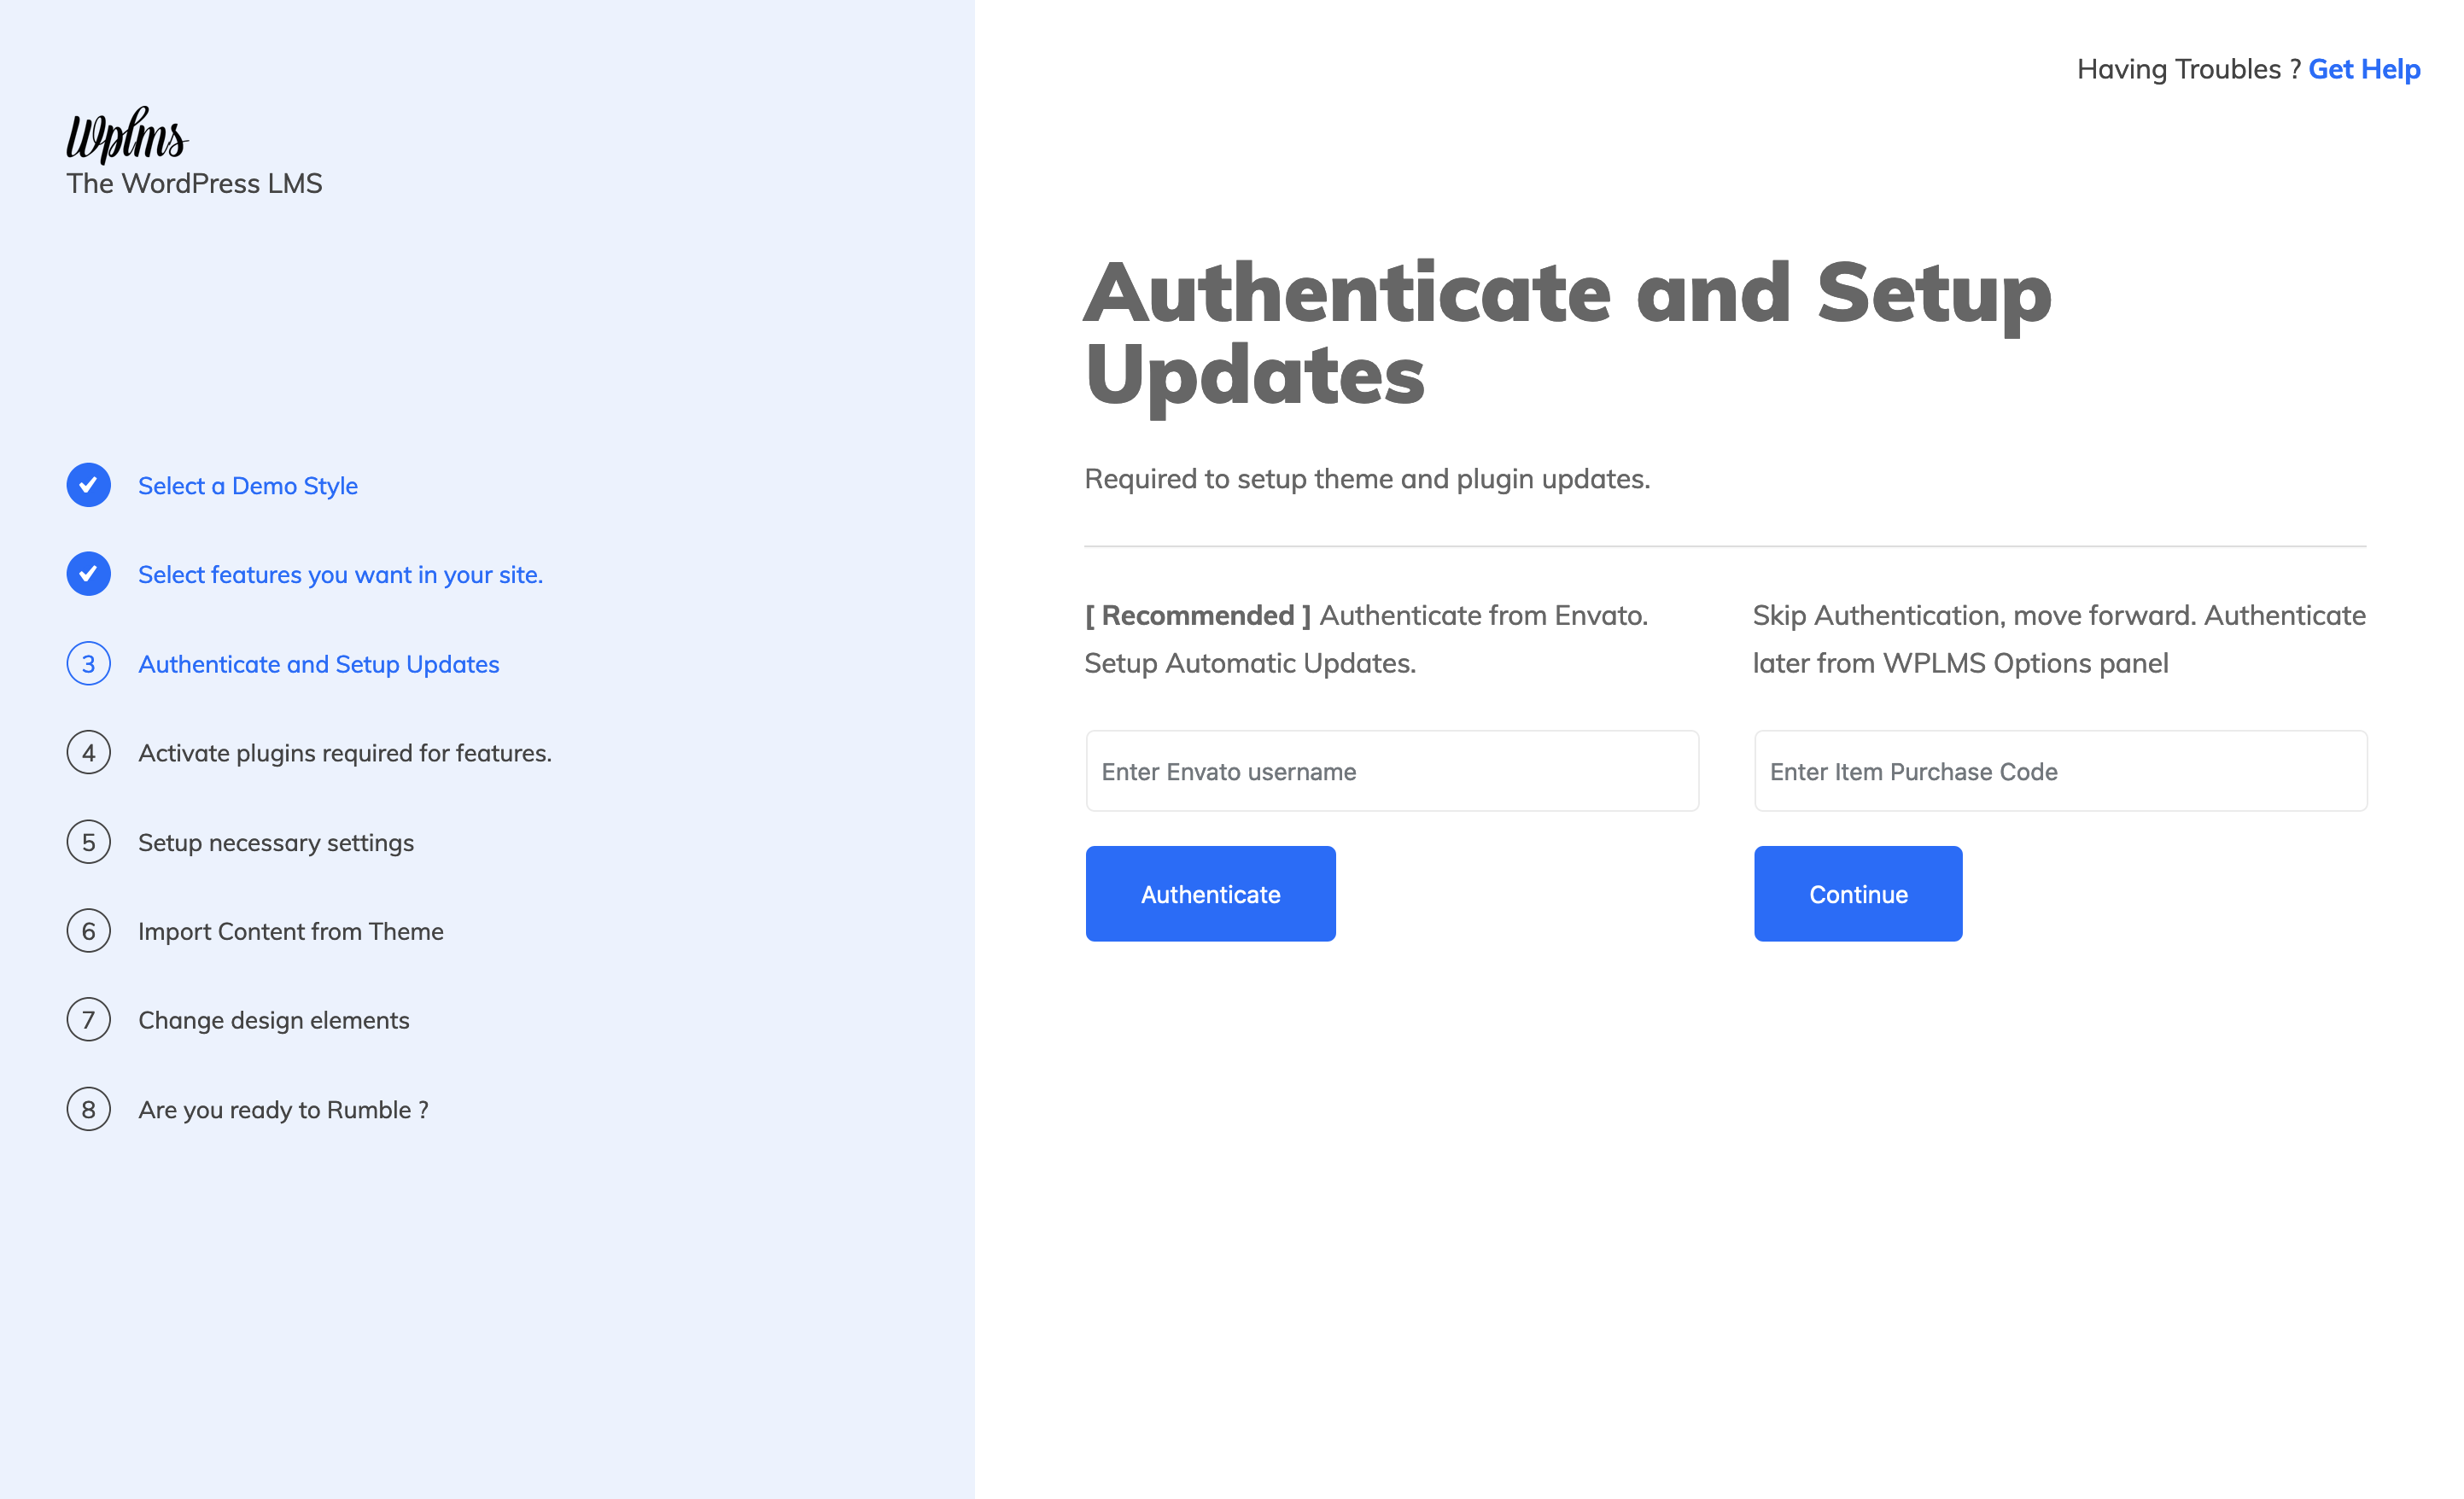
**Item Purchase code.**
How to locate your item purchase code : [Link](https://wplms.io/support/knowledge-base/how-to-find-wplms-theme-purchase-code/)
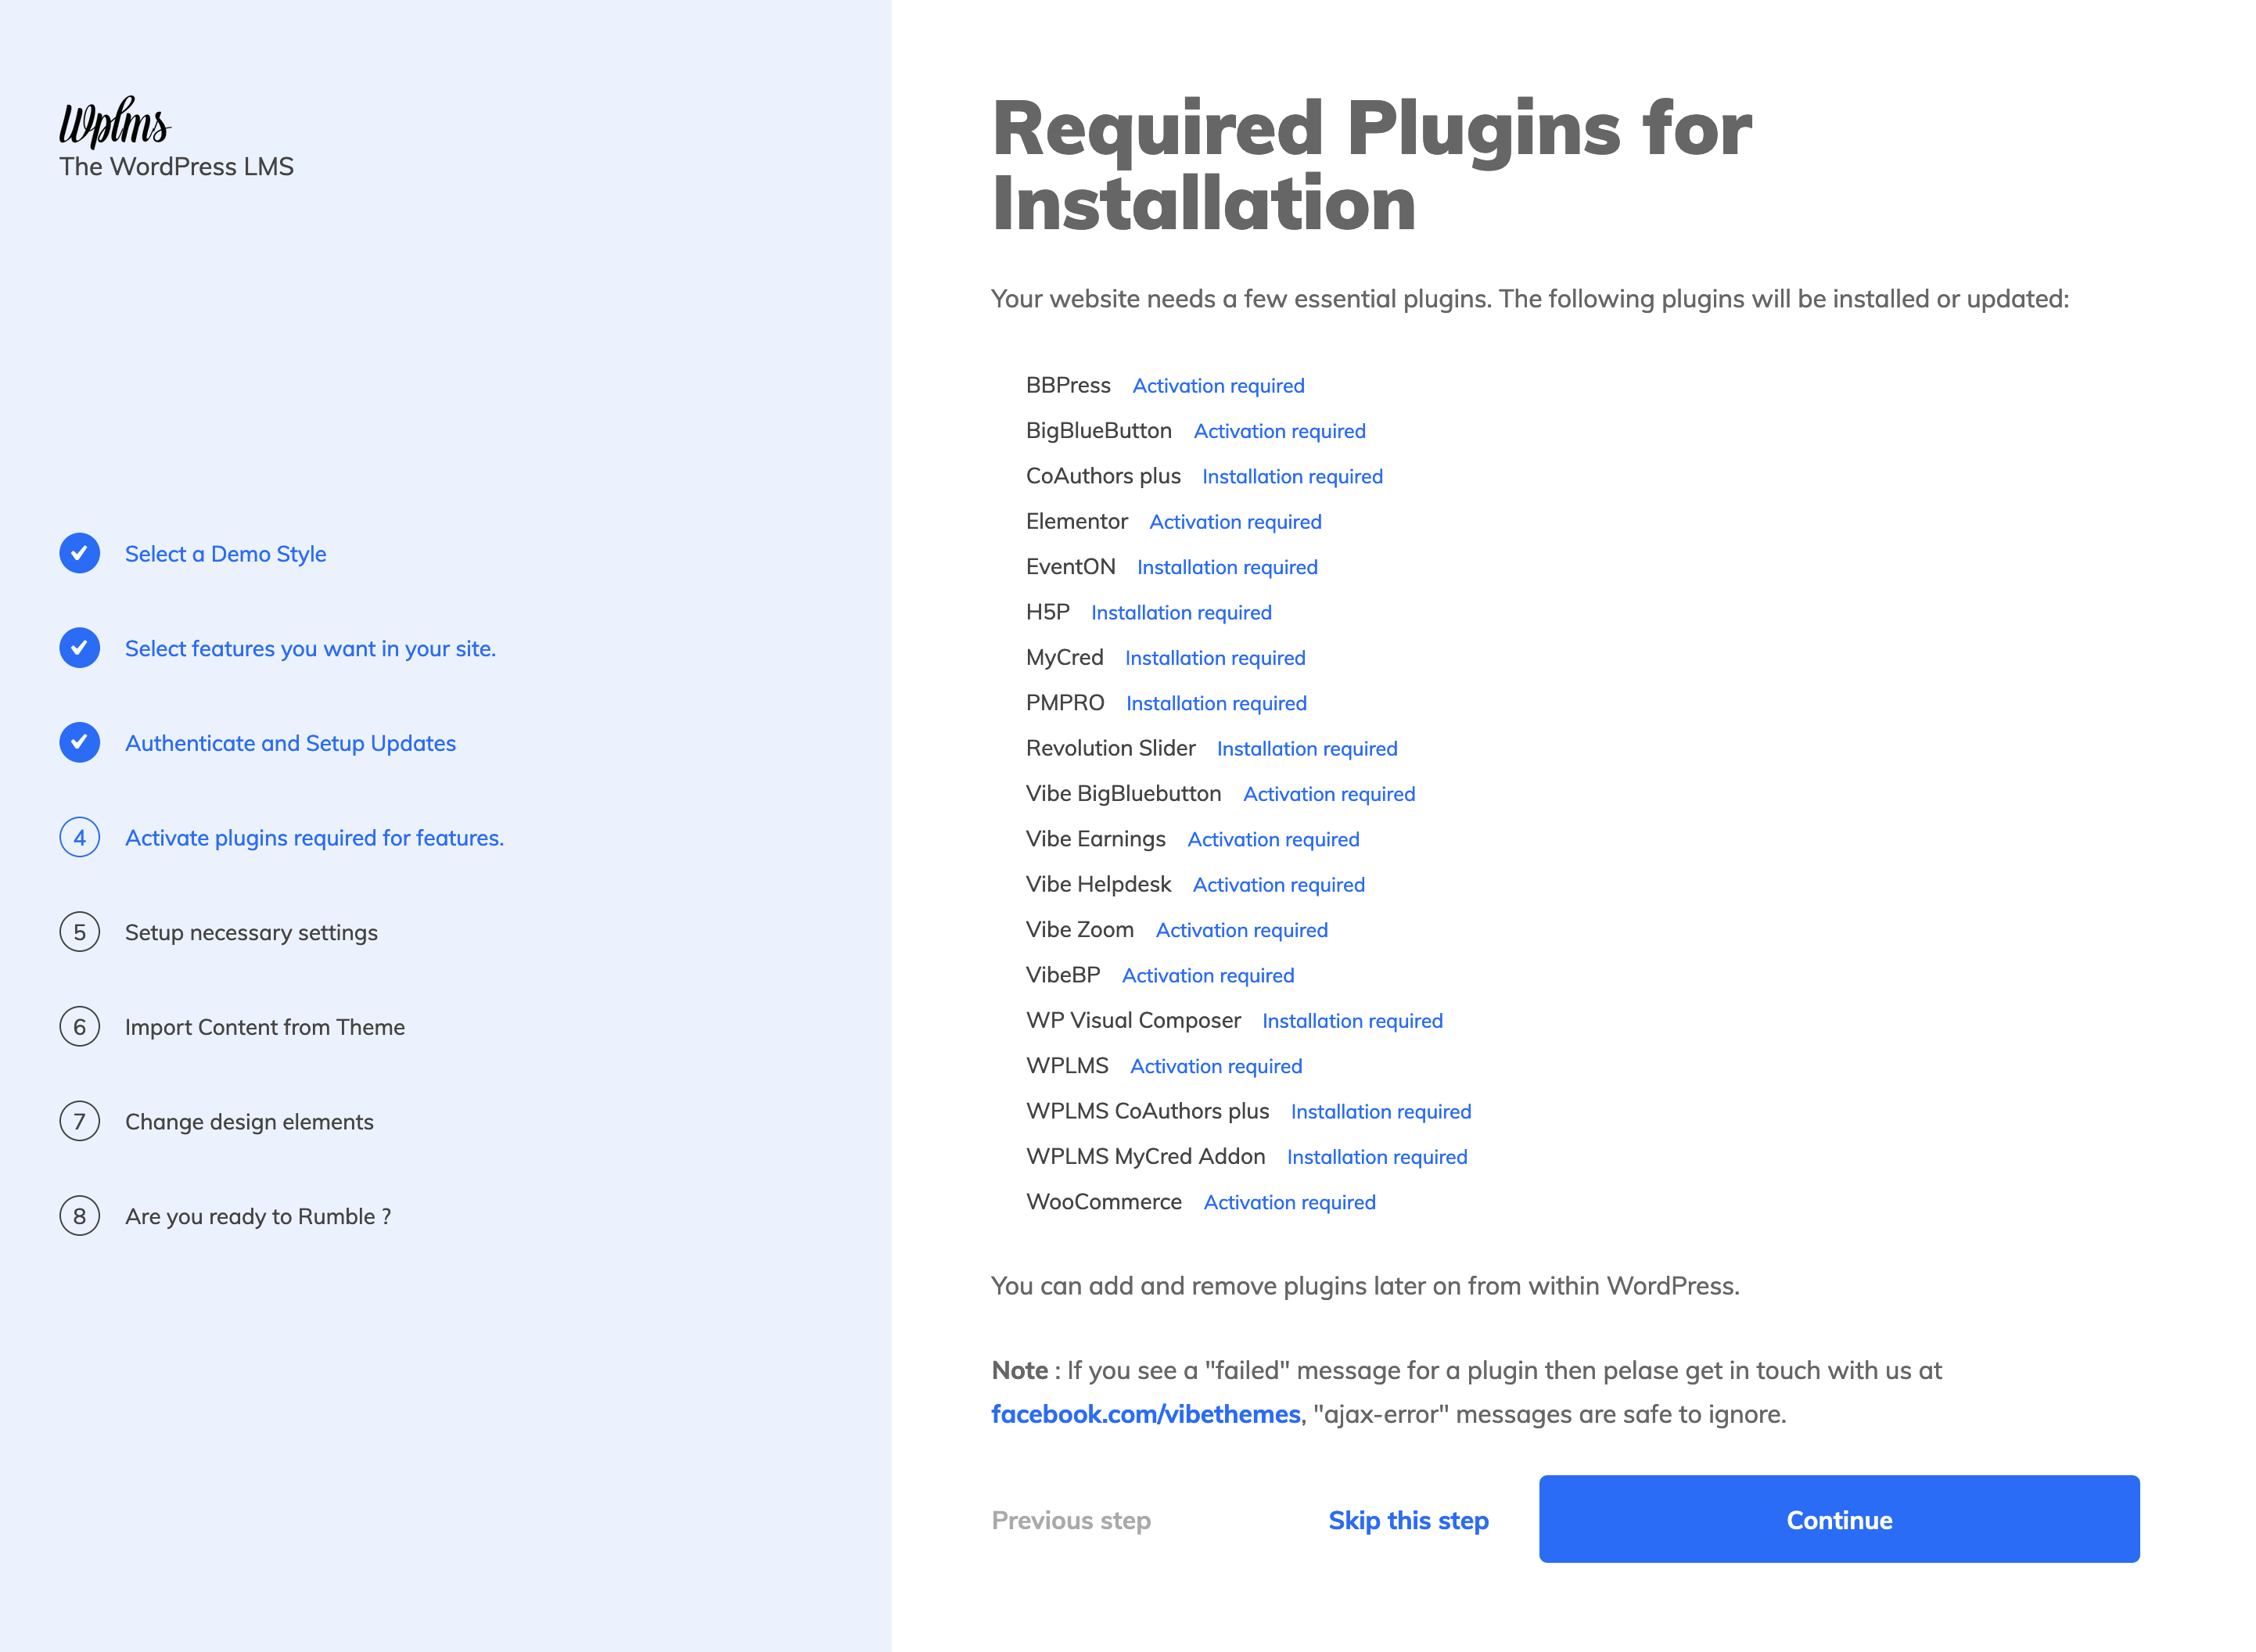
### Installing Plugins
The theme comes with a required and recommended set of plugins. Note that recommendations are good to have but not absolute necessity for the theme to work.
The required plugins for the theme to work as advertised are BuddyPress , WPLMS and VibeBP.
Based on your selection of previous "Features" step you will see the install plugins options here. Note that this is a sub-set of recommended plugins. Post installation you can view the complete set of recommended plugins from WP admin - Appearance - Install plugins section.
You need an active internet connection to download these plugins. The plugins are hosted on Amazon servers and they are always available on the internet.
**Ajax Error while installing plugins.**
You may see some plugins returning status of ajax error. Such messages are safe to ignore as the plugin is trying to take you away from the installation wizard and we stop it from doing so. **Failed Plugins.** In case you see a failed error message, this means the plugin installation failed. It means the rest of the setup process may face further issues. In such cases, if the plugin is not a required plugin **\[BuddyPress, WPLMS & VibeBP]** you can still proceed with the installation. If it is a required plugin then download the plugin manually and install it from the WP admin - Plugins add a new screen.
In case you see failed error messages, you can follow these direct links for plugin downloads for required plugins :
1. BuddyPress: [Download link](https://downloads.wordpress.org/plugin/buddypress.6.2.0.zip)
2. WPLMS :
3. VibeBP :
4. Vibe-Helpdesk :
5. Vibe Drive :
6. Eventon :
7. Revolution Slider :
8. Layer Slider :
9. Visual Composer :
10. Vibe Zoom :
11. Vibe BigBlueButton :
12. Js Composer/Wp Bakery :
13. Vibe Jitsi :
14. Vibe Earnings :
15. Vibe Blogs :
Copy and paste above links in the browser after replacing XXX with the WPLMS purchase code and you will be able to download the plugin files. You'll need to upload at WP dmin - plugins - add new and activate. Once the install and activation of the plugins is complete. Reload this page and you will see the updated status of the plugins.
{% embed url="" %}
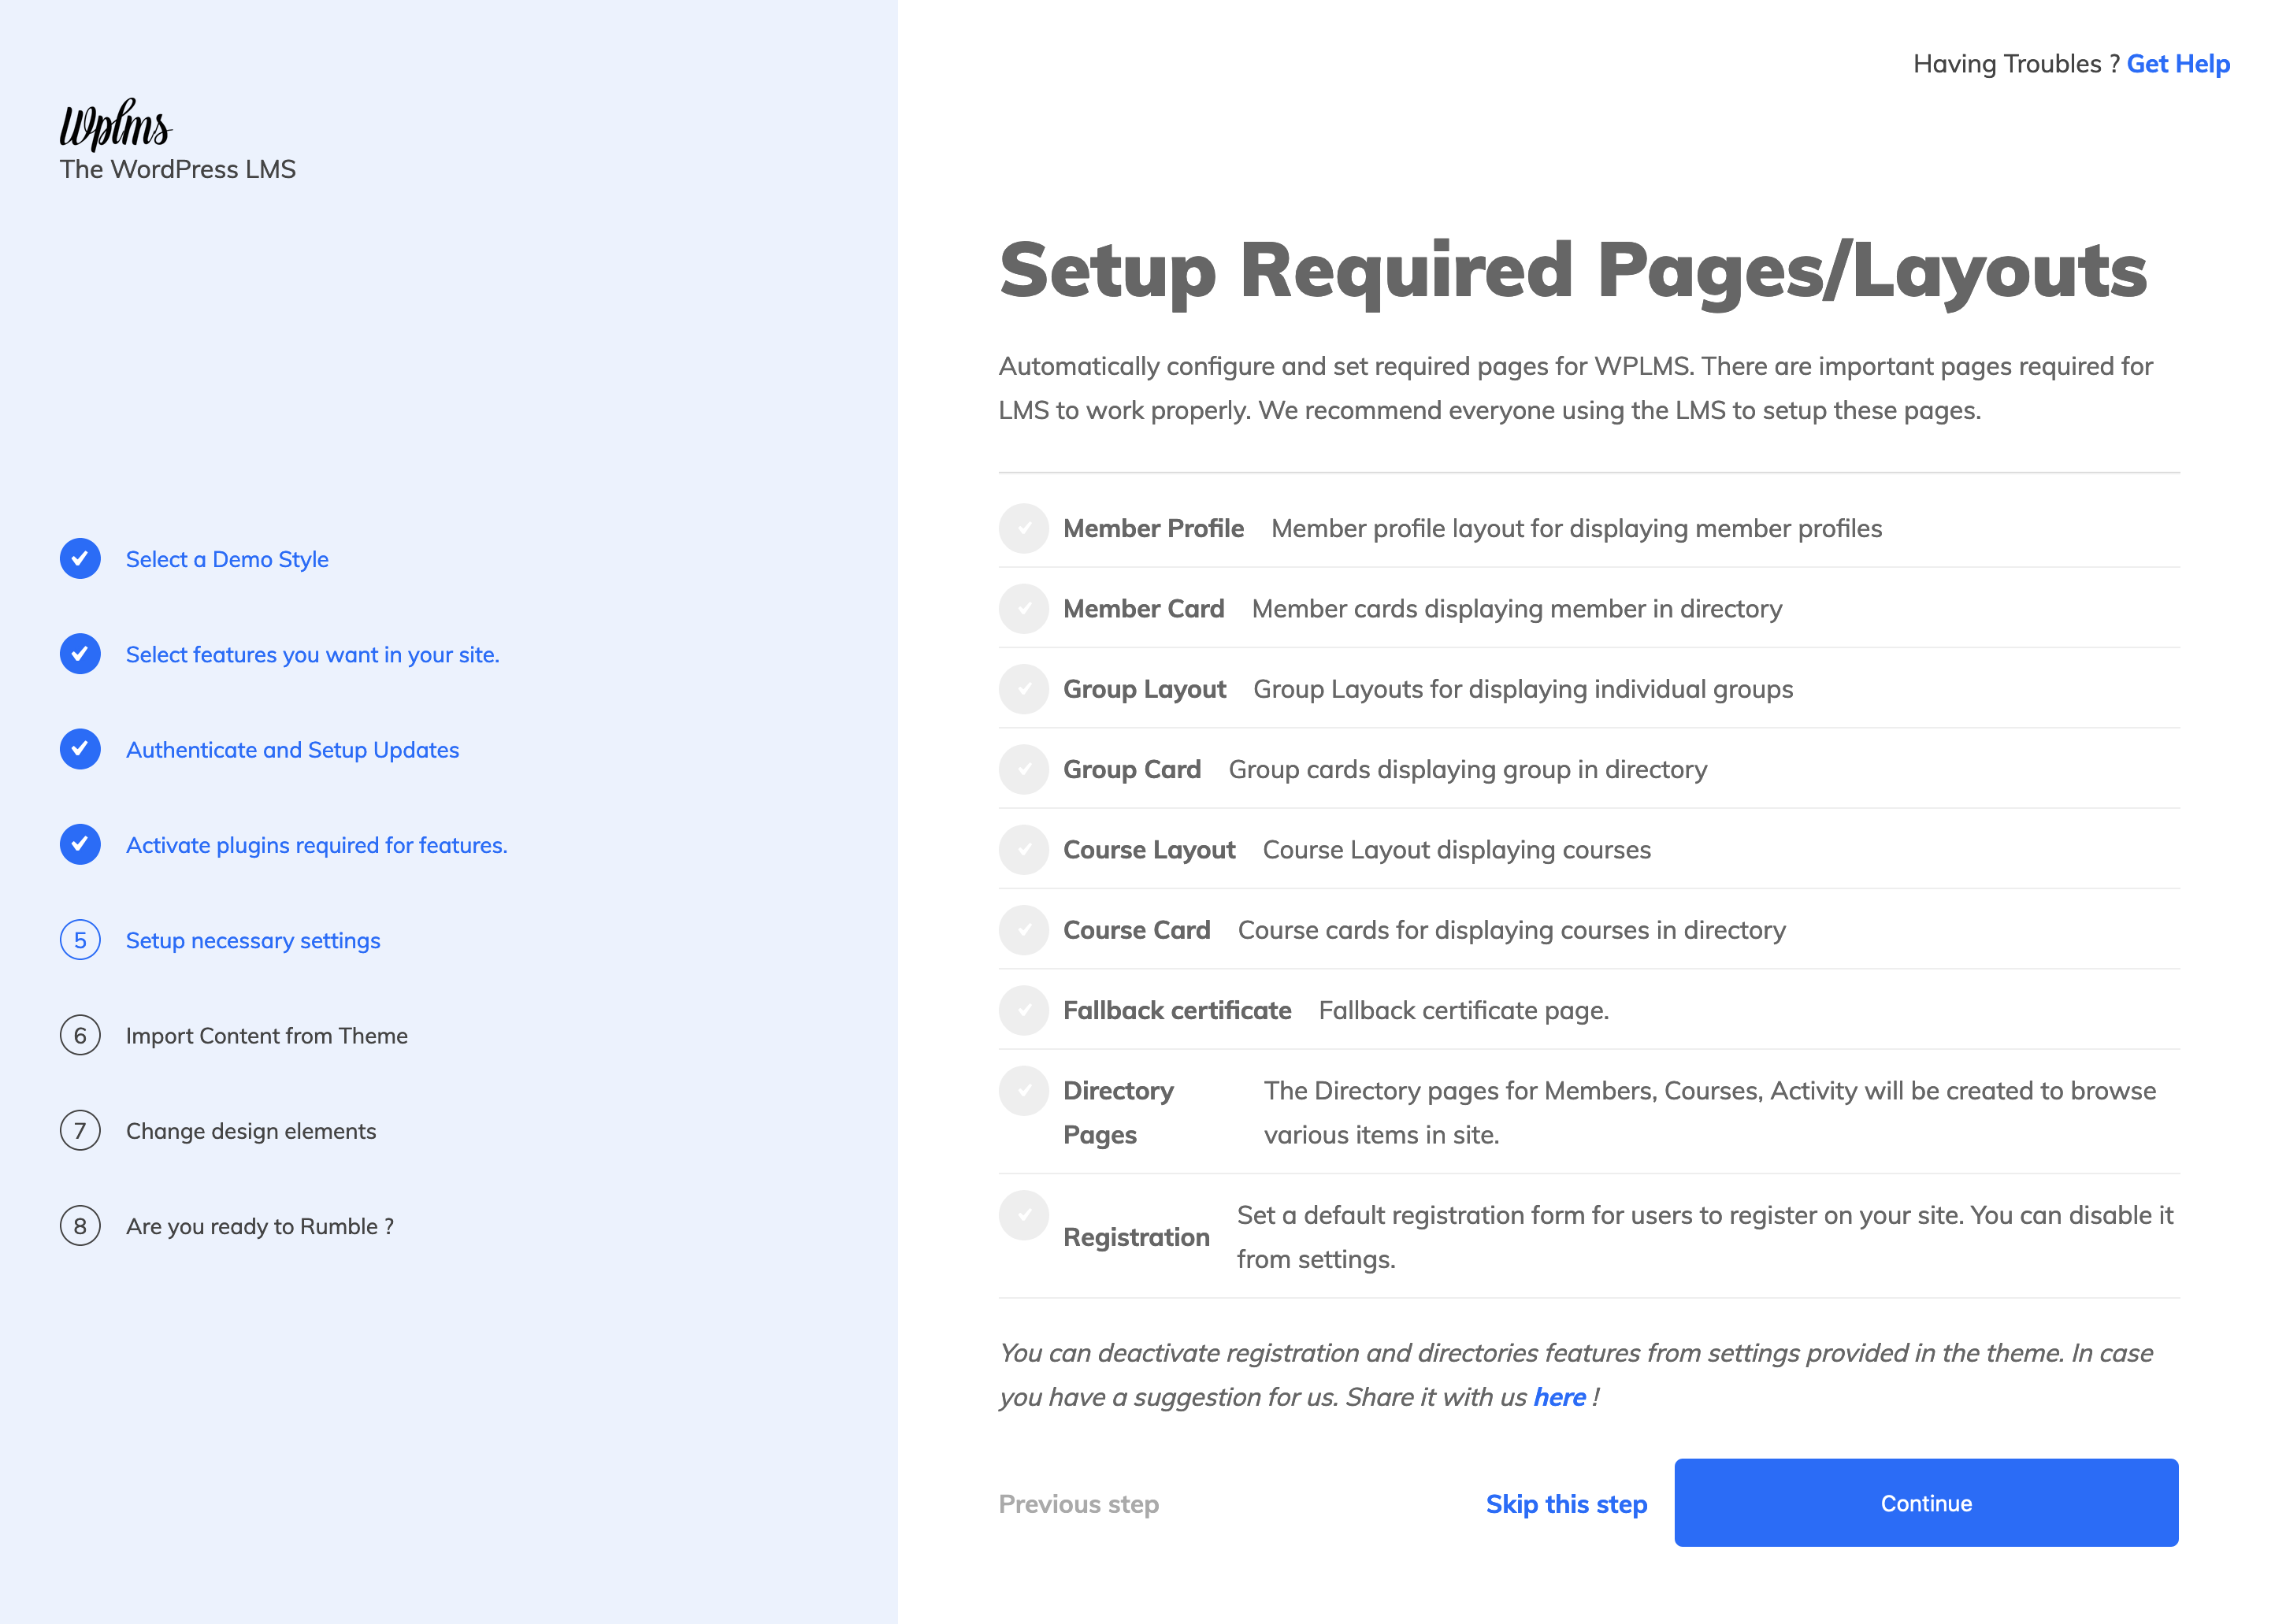
### Required Pages
This step setups up various pages and layouts in the theme. This is one of the required steps we advise everyone to follow even if you are not installing any demo content.
If the pages are already installed you will see the checks in green color. On fresh installation they'll appear as faded.
## Installing Sample Data
The most important step for installing demo content. Note importing sample data is going to put data into your site. So, you can selectively import data into your site as well based on your requirements.
We advise to install all content for a fresh WordPress setup to avoid any issues and output look similar to the demo.
You will see many sections to import and this is a time consuming process. Content is downloaded from the demo and from our Amazon servers and imported in your site.
This is how the import content screen looks like.
If your screen does not appear like this and there is an error in red. It means that your server was unable to load the demo content file which is uploaded in our Amazon servers.
This could be a temporary network issue and you can reload this page to load the data. Or try after few minutes to reload this page and load the data. In case the issue persists, the only alternative to this situation is to upload the content manually. **Export package download links**
1. Academy Demo : [Download link](https://demos.wplms.io/academy/wp-content/uploads/export_demos/academy.zip)
2. V4 Base Demo : [Download link](https://demos.wplms.io/wp-content/uploads/export_demos/chi.zip)
3. Demo 10 : [Download link](https://demos.wplms.io/demos/demo10/wp-content/uploads/export_demos/demo10.zip)
4. Demo 6 : [Download link](https://demos.wplms.io/demos/demo6/wp-content/uploads/export_demos/demo6.zip)
5. Demo 14 : [Download link](https://demos.wplms.io/demos/demo14/wp-content/uploads/export_demos/demo14_export.zip)
6. Demo 1 : [Download link](https://demos.wplms.io/demos/demo1/wp-content/uploads/export_demos/Demo1.zip)
7. Demo 17 : [Download link](https://wplmsupdates.s3.amazonaws.com/demodata/demo17.zip)
8. Learning Center Demo : [Download Link](https://demos.wplms.io/learningcenter/wp-content/uploads/export_demos/learningcenter_export.zip)
Unable to see "Posts","Pages" in import content. You need to download the Zip files of our demos from below links and go back to step 1 "Select a demo style", click on this step on the left menu and upload the downloaded zip file from above links.
{% hint style="info" %}
Nothing works ! no amount of refreshing works. Follow this guide :
{% endhint %}
If you are unable to download the slider, check FAQ section for direct link for sliders.
### Video Walkthrough
Video walkthrough of how to install WPLMS verison 4 on a blank WordPress site.
{% embed url="" %}
## FAQs
FAQ's common mistakes which might happen during the installation.
### Missing Sliders
Demo1 Slider
{% embed url="" %}
Demo2 Slider
{% embed url="" %}
{% embed url="" %}
{% embed url="" %}
Demo3 slider
{% embed url="" %}
Demo4 slider
{% embed url="" %}
{% embed url="" %}
Demo5 Slider
{% embed url="" %}
Demo 6 slider
{% embed url="" %}
Demo 7 Slider
{% embed url="" %}
Demo 8 slider
{% embed url="" %}
DEMO 9 Slider
{% embed url="" %}
{% embed url="" %}
Demo 17 Slider download links
{% embed url="" %}
{% embed url="" %}
{% embed url="" %}
### Direct XML import
here are direct XML import files for the demos
#### Demo 2:
{% file src="/files/-MkB5oR9ywL7qZqQ9T6o" %}
demo2.xml
{% endfile %}
#### Demo 3:
{% file src="/files/-MkB6T39qkNau0CPhmL\_" %}
demo3.xml
{% endfile %}
#### Demo 4:
{% file src="/files/-MkB6cXtkCNaPVH6vq7h" %}
demo4.xml
{% endfile %}
#### Demo 5:
{% file src="/files/-MkB6pC9rVxHhNltv1KB" %}
demo5.xml
{% endfile %}
#### Demo 6:
{% file src="/files/-MkB6xqPXaBNPjjPbhCv" %}
demo6.xml
{% endfile %}
#### Demo 7:
{% file src="/files/-MkB7Zu0iruVtFhwYkm3" %}
demo7.xml
{% endfile %}
#### Demo 8:
{% file src="/files/-MkB7p5WL6\_ArTzEJYza" %}
demo8.xml
{% endfile %}
#### Demo 9:
{% file src="/files/-MkB8-ssGktqDBUGWn2u" %}
demo9.xml
{% endfile %}
#### Demo 10:
{% file src="/files/-MkB8F8lHfUuAcxcfMm5" %}
demo10.xml
{% endfile %}
#### Demo 12:
{% file src="/files/-MkB8YggkHcJqEFHUu5x" %}
demo12.xml
{% endfile %}
#### Demo 13:
{% file src="/files/-MkB8oAQdmI2UVgJGzCh" %}
demo13.xml
{% endfile %}
#### Demo 14:
{% file src="/files/-MkB8yU81MHyo3Esv4vo" %}
demo14.xml
{% endfile %}
#### Demo 15:
{% file src="/files/-MkB9FMmY-E2Lr2XIi6x" %}
demo15.xml
{% endfile %}
#### Demo 16:
{% file src="/files/-MkB9ZK0TCtocrlH4ES6" %}
demo16.xml
{% endfile %}
#### Demo 17:
{% file src="/files/-MkB9hGCvaSUFnBM6\_JM" %}
demo17.xml
{% endfile %}